Appium is a implementation of the WebDriver Wire Protocol, but geared towards automating user interface on mobile devices rather than web browsers.
As such the Appium tool is a specialization of the WebDriver tool in SeqZap, and the documentation of that tool is required reading.
Appium can automate iOS and Android devices, and both emulators/simulators and real devices.
If an app is designed for both Android and iOS – and have a sufficiently similar UIs the same Test Case can test both the Android and the iOS version of the app.
The key to making this happen is to have selectors which are independent of the underlying platform.
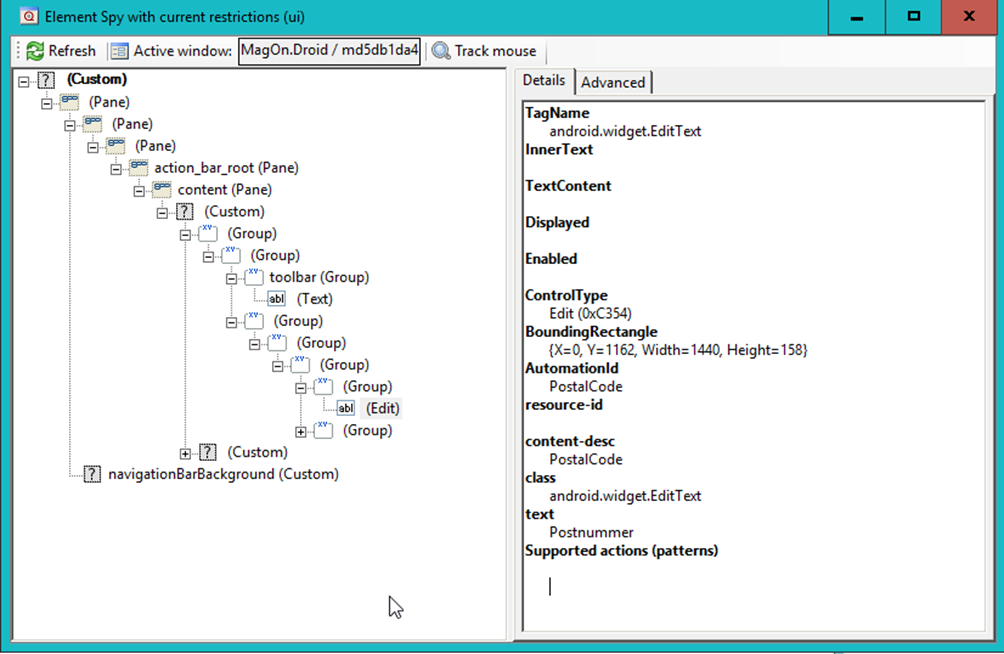
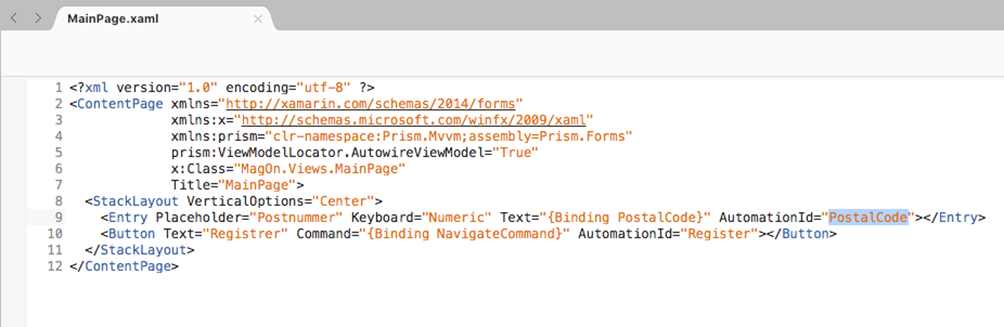
If the UI of an app is inspected, we can see a lot of identifiers which are specific to that particular platform, for instance in this demo app, the PostalCode edit field is shown in the Element Spy panel:
The “content-desc” attribute is an Android specific identifier, but the attribute is also exposed as AutomationId – this is purely something SeqZap does to make it easier to write cross platform test cases.
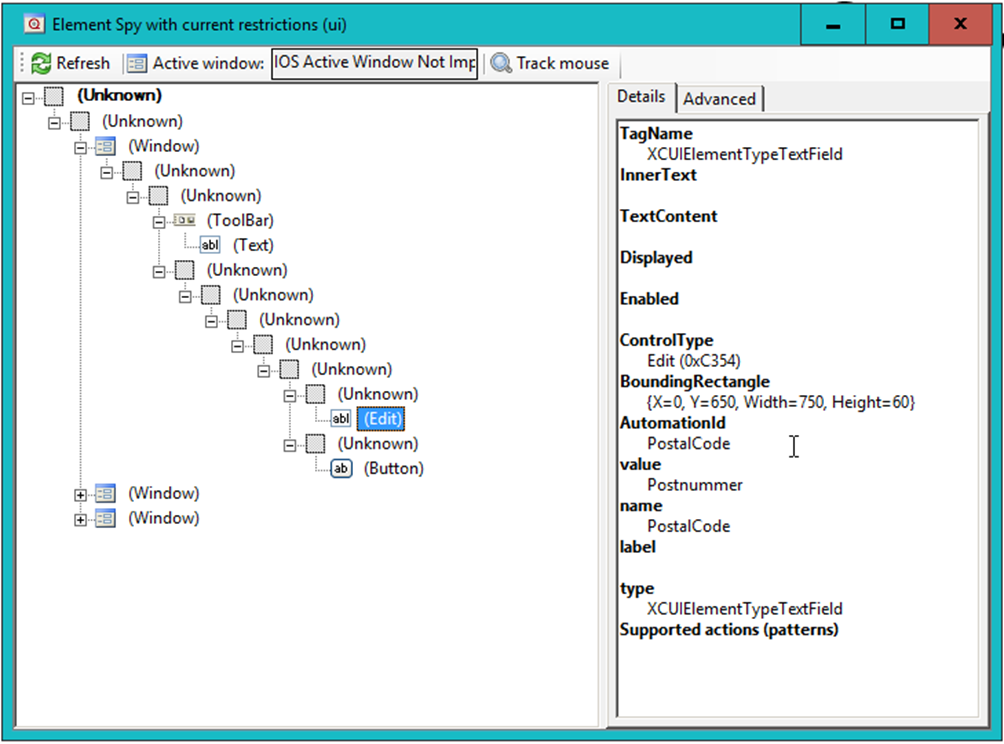
If we take a look at the same PostalCode text field on the iOS version of the same demo app, then we can see that many of the attributes have changed – the Android specific ones – but the AutomationId is still the same.
This is because on iOS the AutomationId attribute is mapped to the “name” attribute.
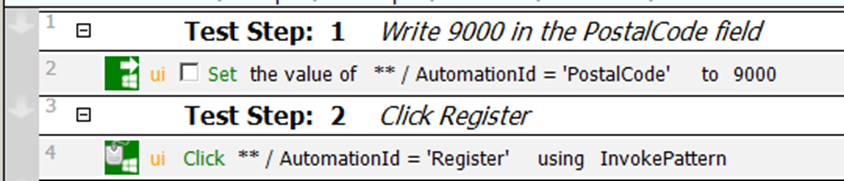
This means that to write cross platform test cases, the test should rely on only the AutomationId as the identifier in the selector, for instance:
This also has the added benefit of making the test run much faster, since using the AutomationId to identify UI elements has special handling in Appium which run much faster.
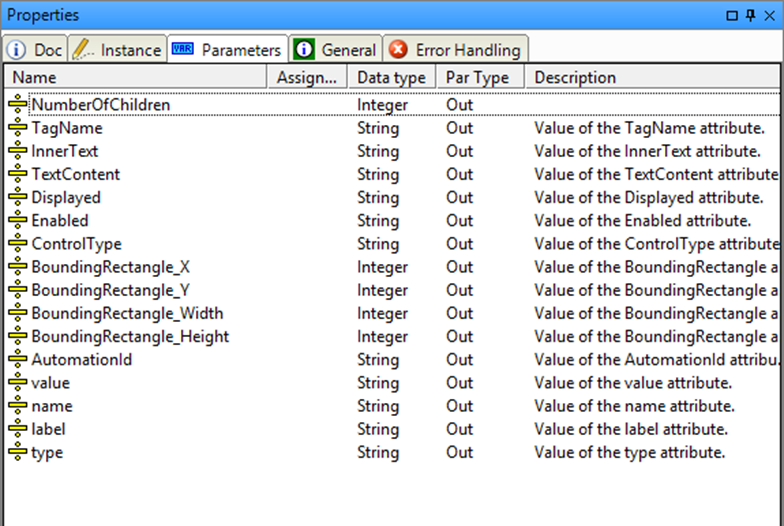
Please note that the use of the Get Information step will break cross-app testing since the Get Information step changes based on the iOS and Android, more specifically the output parameters change based on the plarform.
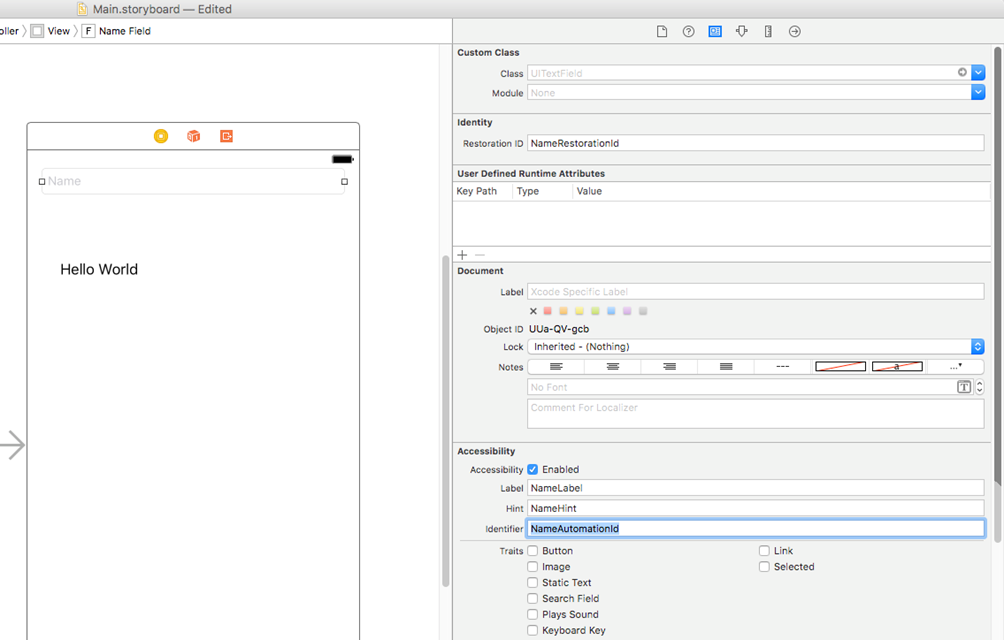
Setting the AutomationId on iOS is done by setting the “Identifier” Accessiblity property by selecting the UI element in the editor and using the Identity inspector in XCode.
In the screenshot above the “Name” text field’s AutomationId is set to NameAutomationId.
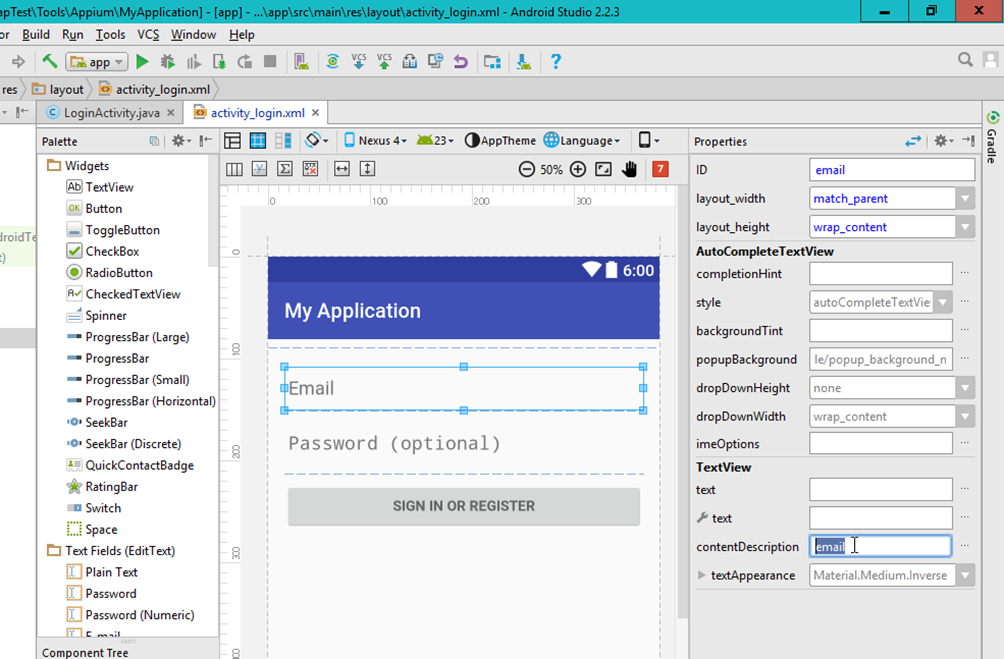
Setting the AutomationId on Android is done by setting the “contentDescription” property using the Layout editor’s Properties view.
Setting the AutomationId when developing apps using the Xamarin.Forms framewok is even easier since the AutomationId attribute in Xamarin already maps to the corresponding attribute on Android/iOS.
This means that the AutomationId set during development can be used during testing also.
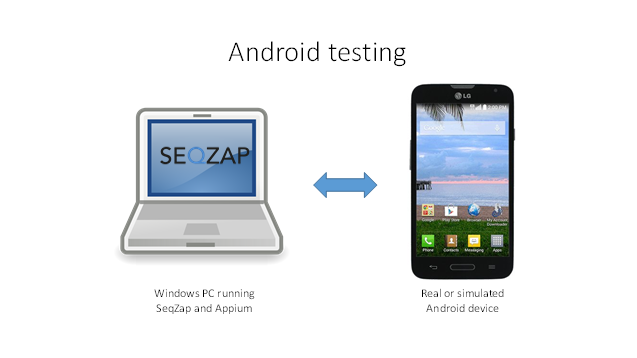
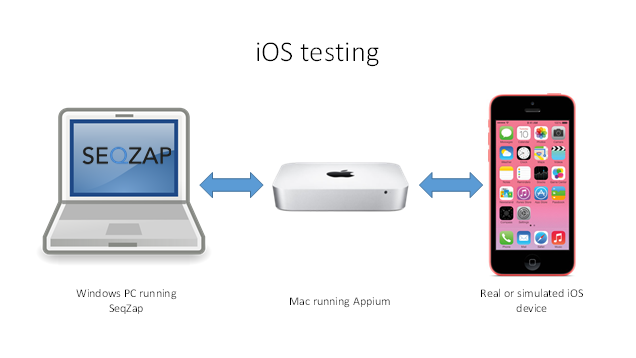
Appium is running on the PC and is responsible for starting the emulator, or connecting to the real device using USB.
Android devices can be automated on the same PC, which is also running SeqZap.
While iOS can only be automated using a real Mac device running Appium.
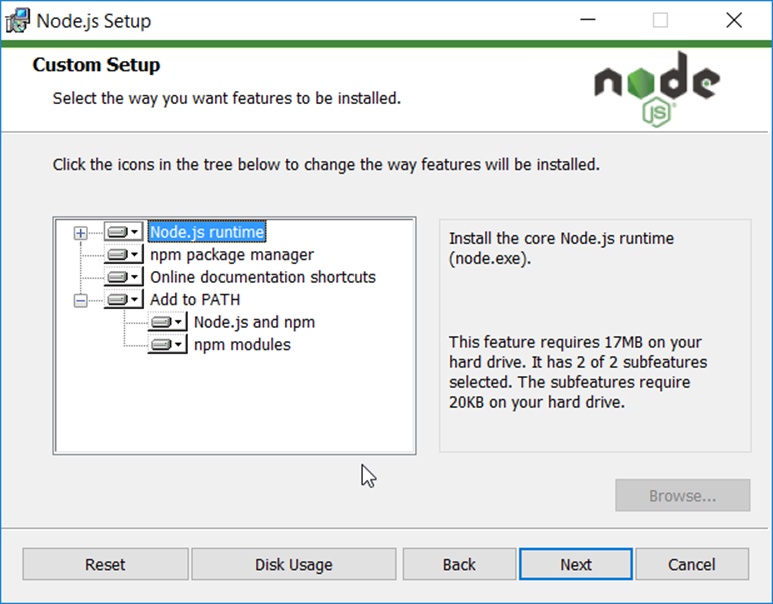
Appium is a Node.js based application, and therefore Node.js must be installed.
When installing Node.js, use the LTS installer and remember to add Node.js to the path.
After installing node.js, Appium can be installed using the Node.js package manager “npm”.
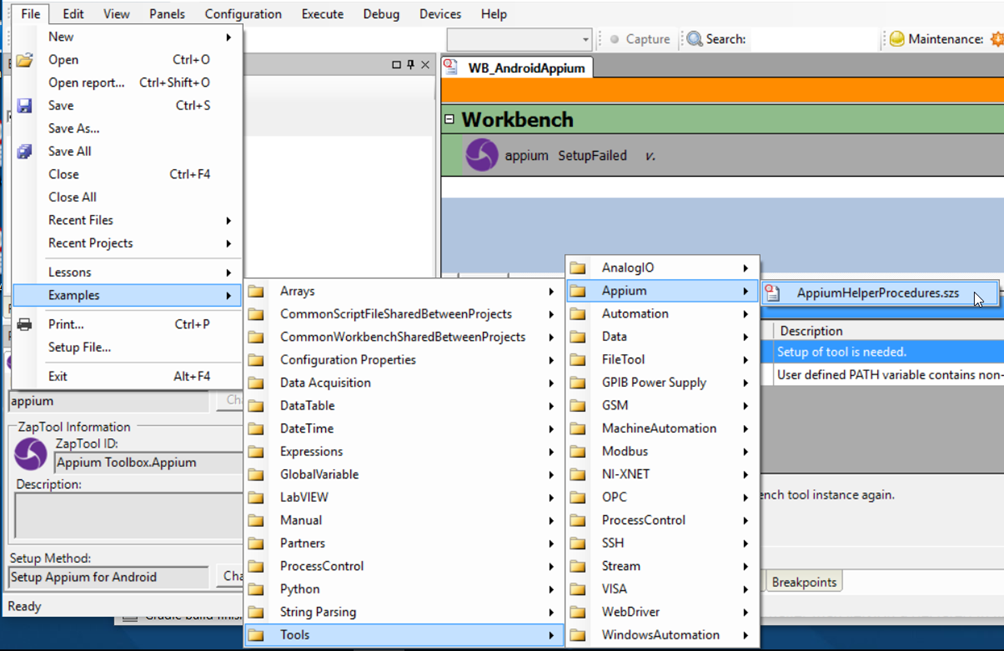
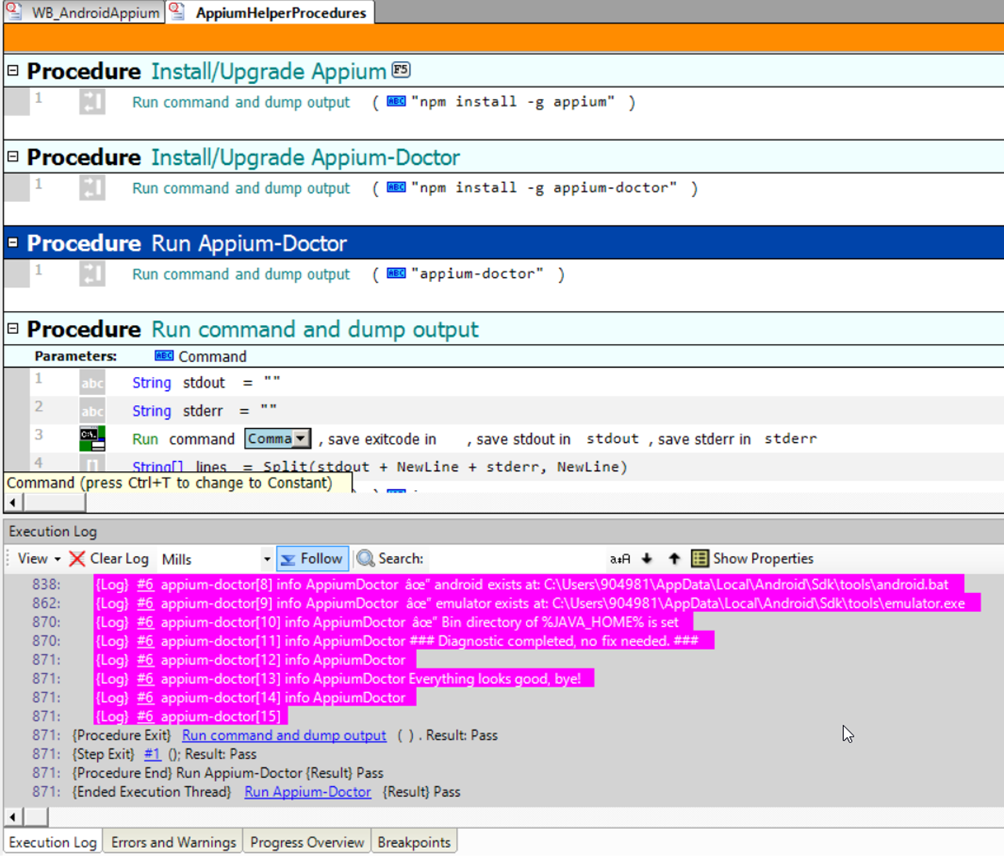
SeqZap comes with a script file to make it easier to install Appium on Windows, it can be accessed by opening the File->Examples->Tools->Appium->AppiumHelperProcedures.szs example
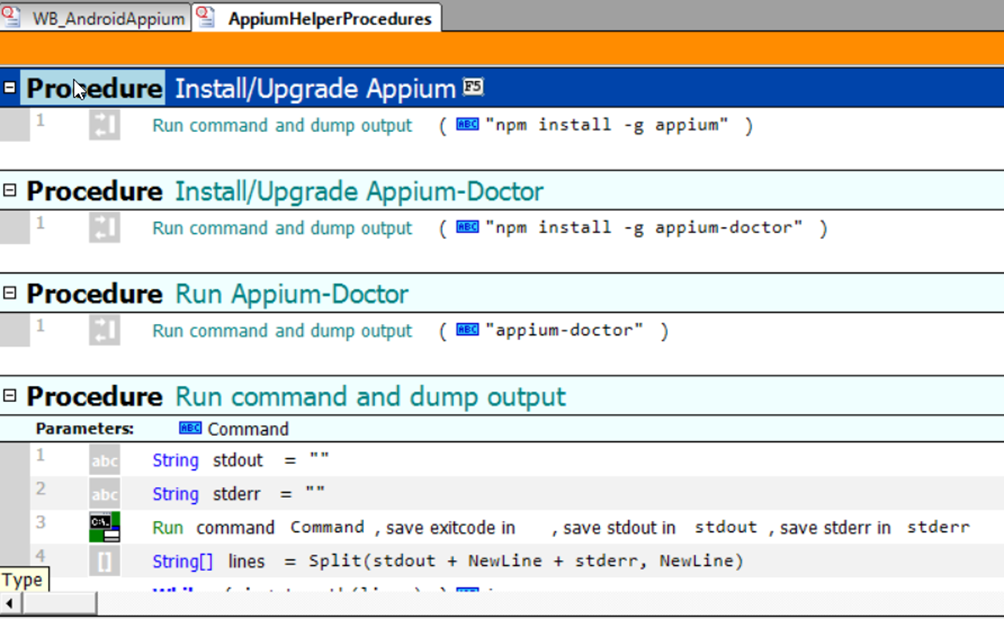
The first two procedures will use npm to install Appium and the diagnostics tool Appium-Doctor using the Node.js package manager.
After installing Appium and Appium-Doctor, Appium-Doctor can be used to diagnose whether the installation of Appium is correct. The procedure “Run Appium-Doctor” will run the diagnostics utility and echo the output to the execution log.
After having successfully having installing Appium, the diagnostics tool should report that “Everything looks good, bye!”.
Configuring Appium for Android testing
Windows needs to be configured to find the Android SDK and related tools in order for Appium, and hence SeqZap, to be able to test Android applications.
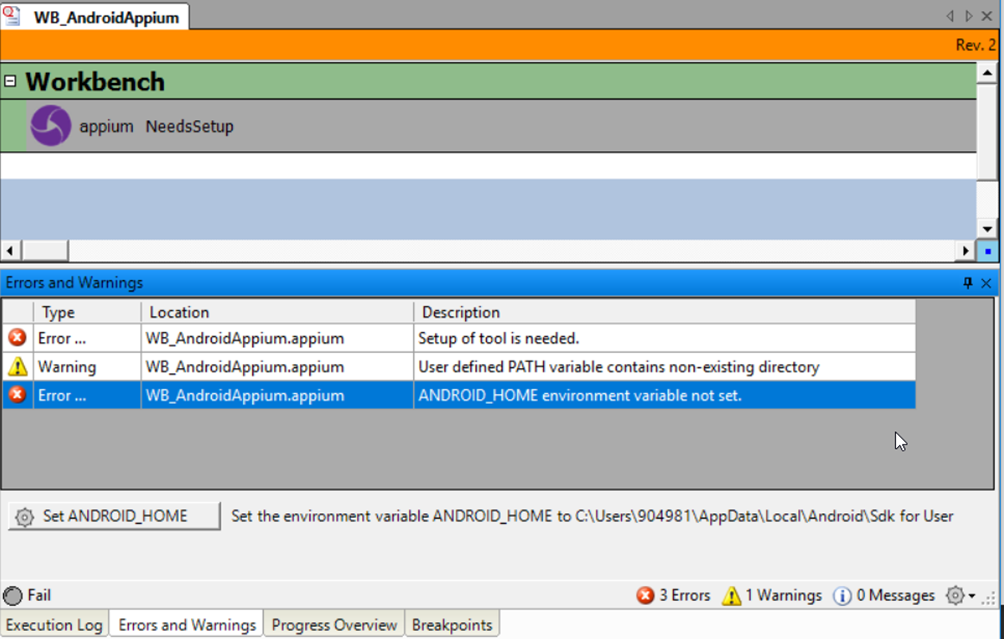
When adding the Appium tool to a workbench, the tool will report parse errors with “auto-fix” buttons to set the relevant environment variables.
When first adding Appium to the workbench it will report several errors:
If you have Java installed on the PC, SeqZap should show an auto-fix button to set the JAVA_HOME environment variable, otherwise Java can be installed from the java.com website.
The ANDROID_HOME environment variable needs to point to the Android SDK, the easiest way to install the SDK is by installing the Android Studio IDE.
Please note that you may need to restart the PC for the new settings to be registered and the reported Errors & Warnings to be fixed.